
kidkraft dollhouse instructions
KidKraft dollhouses are beloved for their detailed designs and sturdy construction, offering hours of creative play. Assembly requires attention to step-by-step instructions to ensure stability and safety.
1.1 Overview of KidKraft Dollhouses
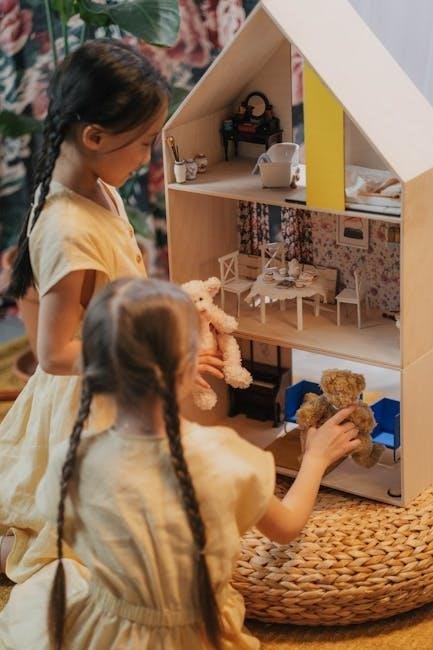
KidKraft dollhouses are renowned for their intricate designs, durability, and imaginative play value. Designed for children aged 3 and above, these dollhouses feature detailed interiors, sturdy wooden construction, and vibrant finishes. They cater to creative play, fostering storytelling and nurturing skills. With easy-to-follow instructions, assembly is straightforward, requiring minimal tools. KidKraft dollhouses are a popular choice for parents seeking high-quality, engaging toys that inspire creativity and lasting enjoyment. Their classic appeal ensures they remain a timeless favorite in many households.
1.2 Importance of Following Instructions
Following the provided instructions ensures a smooth and safe assembly process for KidKraft dollhouses. Proper assembly guarantees the product’s stability and longevity, preventing potential hazards. Deviating from the guide may result in structural issues or safety risks, especially for children. Reading through the manual beforehand helps avoid costly mistakes. Adhering to the instructions also ensures all parts fit correctly, maintaining the product’s quality and aesthetic appeal, which is essential for both functionality and enjoyment.
Safety Precautions and Tools Needed
Assembly requires adult supervision and basic tools like Allen wrenches and screwdrivers. Keep small parts away from children to ensure safe and secure construction.
2.1 Safety Guidelines for Assembly
Ensure adult supervision for the entire assembly process. Keep small parts and sharp objects out of children’s reach. Wear protective gear like gloves to avoid injuries. Work on a stable, flat surface to prevent accidents. Avoid over-tightening screws, as this may damage the material. Follow instructions carefully to ensure proper fitting of parts. Double-check all connections before allowing children to play. Regularly inspect the dollhouse for loose components to maintain safety and durability.
2.2 List of Required Tools
To assemble a KidKraft dollhouse, you’ll need a few essential tools. Start with a flathead screwdriver for removing packaging and handling small screws. A Phillips screwdriver is necessary for securing major components. An Allen wrench (3mm or 5mm) is often required for tightening bolts. A small hammer may be useful for tapping parts into place gently. Pliers can help with stubborn clips, while a measuring tape ensures accurate alignment. Safety gloves and a soft cloth are recommended to protect both you and the dollhouse during assembly.
Step-by-Step Assembly Instructions
Begin with unpacking and organizing parts, then construct the base and framework. Attach walls and floors, followed by doors, windows, and accessories, ensuring each step aligns properly;
3.1 Unpacking and Organizing Parts
Begin by carefully unpacking all components from the box to ensure no damage. Check the inventory list to confirm all parts are included. Organize pieces by type, such as walls, floors, and accessories, and label them for easy identification. Refer to the manual for a visual guide to categorize items effectively. Use the provided hardware bags and tools, like screwdrivers, to prepare for assembly. Clear a large, flat workspace to streamline the process. KidKraft packages parts in labeled bags for convenience, making it easier to locate specific items during assembly. Always keep small parts out of reach of children.
3.2 Building the Base and Framework
Start by assembling the base using the provided screws and Allen wrench. Attach the legs to the base plate, ensuring stability. Next, construct the main framework by connecting the side panels and back support. Use the instructions to align holes correctly for screws. Tighten all connections firmly to create a sturdy foundation. If necessary, use a rubber mallet to tap pieces into place gently. Ensure the framework is level before moving on to attach walls and floors. This step is crucial for the overall structural integrity of the dollhouse.
3.3 Attaching Walls and Floors
Align the pre-drilled walls with the base framework, ensuring the tabs fit snugly into the slots. Secure each wall using the provided screws, tightening evenly. For multi-level dollhouses, attach the intermediate floor by aligning its brackets with the base. Gently tap walls and floors into place using a rubber mallet to avoid damaging the wood. Double-check the alignment before tightening all screws firmly. This step ensures the structure remains stable and ready for the next phase of assembly. Proper alignment is key to a secure fit. Use the instructions to verify each connection. Always ensure floors are level before proceeding.
3.4 Installing Doors, Windows, and Accessories
Begin by aligning the pre-drilled doors and windows with their designated frames. Use the provided screws to secure them, ensuring they fit snugly without forcing. For doors, attach hinges and handles according to the instructions. Next, install any accessories like staircases or furniture brackets. Double-check the alignment to ensure proper fit and functionality. Gently tighten all screws to avoid damaging the wood. Finally, test doors and windows to ensure they open and close smoothly. This step adds the finishing touches to your dollhouse. Patience and precision are key for a polished result.

Assembly Tips and Best Practices
Plan ahead, organize parts, and follow instructions carefully. Use the right tools to avoid mistakes. Test-fit components before securing them permanently to ensure proper alignment and fit.
4.1 Common Mistakes to Avoid
Common mistakes include not reading instructions thoroughly, misaligning parts, and using incorrect tools. Forcing pieces together can damage the dollhouse. Skipping steps or ignoring safety precautions may lead to unstable structures. Failing to organize parts beforehand can cause confusion. Ensure all hardware is securely tightened but not over-tightened, as this may strip screws. Double-check each step before moving forward to avoid disassembly. Proper alignment is crucial for doors, windows, and accessories to function smoothly. Taking your time ensures a sturdy and enjoyable final product.
4.2 Time-Saving Techniques
To save time during assembly, organize all parts and hardware beforehand. Refer to the instruction manual for a clear overview before starting. Pre-sorting components by type or step reduces confusion. Use a small tray or container to keep screws and bolts within reach. Follow the step-by-step guide meticulously to avoid backtracking. Consider pre-assembling smaller sections like doors or accessories separately. Using the correct tools, as listed, ensures tasks are completed efficiently. Taking breaks to maintain focus can also prevent errors and speed up the process overall.
Troubleshooting Common Issues
- Identify missing or damaged parts early and contact KidKraft support for replacements.
- Double-check instructions for alignment issues; ensure all pieces fit snugly.
- Loose joints may require additional screws or tightening for stability.
5.1 Dealing with Missing or Damaged Parts
If parts are missing or damaged, contact KidKraft customer support immediately for replacements. Refer to the item number and part description in the manual. Always check the packaging thoroughly before assembly to identify any issues early. Keep all unassembled parts out of children’s reach to prevent accidental loss or damage. Regularly inspect the dollhouse for loose or misaligned components and tighten them as needed to ensure stability and longevity.
5.2 Solving Alignment and Fit Problems
Alignment issues can often be resolved by double-checking the instructions and ensuring parts are properly aligned before securing them. Use a rubber mallet to gently tap pieces into place, avoiding force that might damage the wood. If a part doesn’t fit, verify its orientation and placement. If problems persist, disassemble the section and retry, ensuring all components are correctly positioned. This step-by-step approach helps maintain structural integrity and prevents costly mistakes.

Accessing Additional Resources
Visit www.kidkraft.com for official manuals, video tutorials, and replacement parts. The BILT app also offers guided assembly instructions for specific models like the Grand Estate Dollhouse.
6.1 Official KidKraft Assembly Manuals
Official KidKraft assembly manuals are available on their website, providing detailed step-by-step instructions for each dollhouse model. These manuals include diagrams and part lists to ensure accurate assembly. Users can download PDF versions, making it easy to follow along. Additionally, specific models like the Majestic Mansion and Amelia Dollhouse have dedicated guides to help users navigate the assembly process smoothly and efficiently.
6.2 Video Tutorials and Guides
KidKraft offers video tutorials on their official channels and platforms like YouTube, providing visual step-by-step guidance for assembling dollhouses. These videos cover models such as the Grand Estate and Disney Princess Ariel Undersea Kingdom Dollhouse. Additionally, the BILT app features interactive assembly guides for select KidKraft models. These resources help users follow along effortlessly, ensuring proper assembly and minimizing errors. Videos are available in various languages and are accessible on KidKraft’s website and other online platforms, making assembly more straightforward for users worldwide.
Completing your KidKraft dollhouse assembly is rewarding, offering endless creative play for children. Regular cleaning and secure storage ensure longevity, making it a lasting treasure.
7.1 Final Check and Enjoyment
After completing the assembly, conduct a final inspection to ensure all parts are securely attached and the dollhouse is stable. Double-check that all doors, windows, and accessories function properly. Once satisfied, let your child explore their new KidKraft dollhouse, fostering creativity and imaginative play. Regularly clean the surface and store small accessories safely to maintain its condition. This thoughtful craftsmanship ensures years of enjoyment for your little ones.
7.2 Maintenance Tips for Longevity
Regularly inspect the dollhouse for loose parts and tighten as needed. Use a soft cloth to wipe down surfaces, avoiding harsh chemicals that could damage the finish. Protect the dollhouse from moisture to prevent warping. Store small accessories in a designated container to prevent loss. By following these maintenance tips, your KidKraft dollhouse will remain sturdy and charming, providing years of enjoyment for your child. Proper care ensures its longevity and continued safety for playful imaginations.